Overview
Content Delivery Networks are a great mechanism that you can use to serve up content quickly and easily across multiple platforms, as well as handle security certificates for you. Amazon CloudFront is a CDN operated by Amazon Web Services that you can use to pass a cert required for SSL for click and open tracking.
Expectations:
The purpose of this article is to help users prep for SSL for click and opening tracking using CloudFront; however, it is important to clarify that the following configuration is done mainly on Amazon CloudFront's environment. Therefore, if any problem arises, we expect our users to reach out to Amazon CloudFront for Support.
Using CloudFront
The following instructions assume you already have an Amazon CloudFront account.
The instructions also assume that you have set up a valid link branding on your account. This step is essential for the following instructions to work:
Origin:
- Sign in to the AWS Management Console and open the CloudFront console at
https://console.aws.amazon.com/cloudfront/v3/home - Choose Create Distribution
- In "Origin domain" type in "sendgrid.net". Then select "HTTPS only" in protocol
- Make sure to enter "443" for the "HTTPS port" as 443
- For "Minimum origin SSL protocol," select "TLSv1.2"
- Input an appropriate name for this distribution. In this case, "sendgrid.net" has been used
Please see the following image with the changes highlighted:
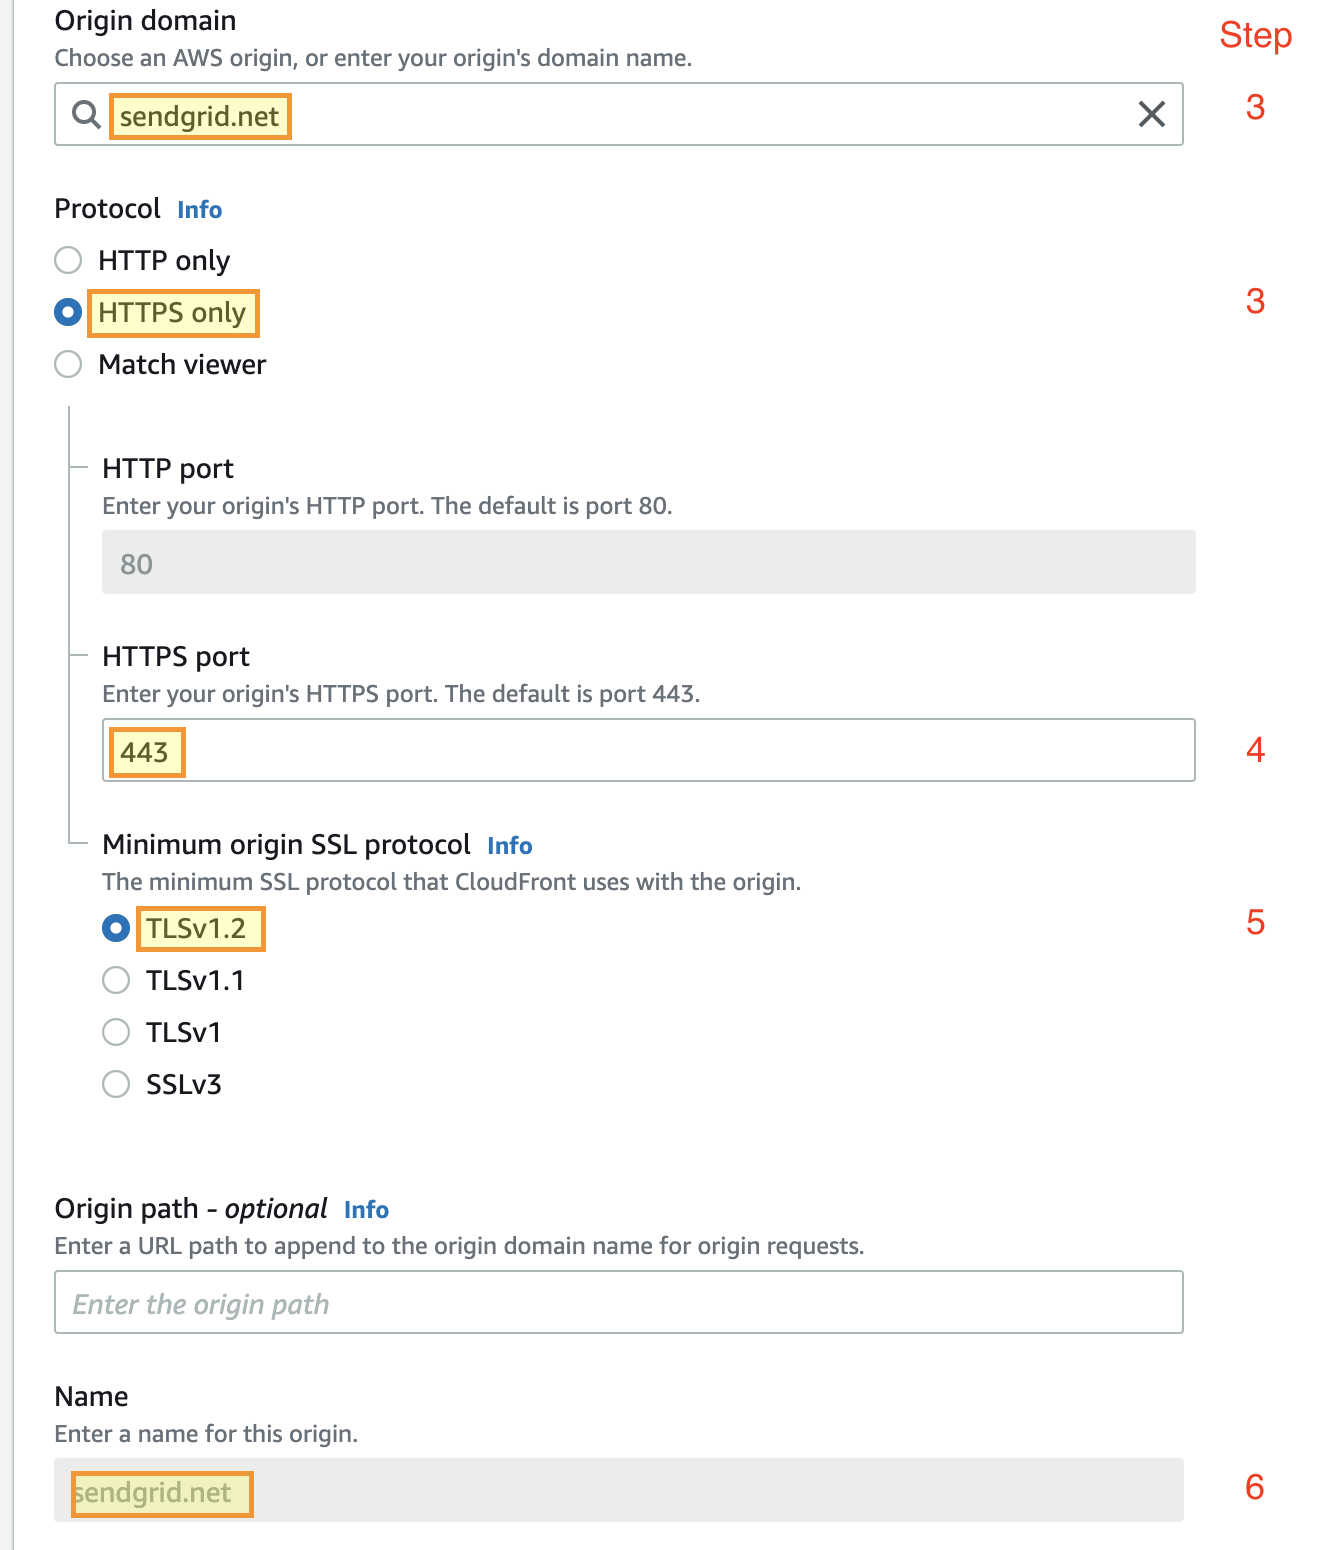
Note: For fields not mentioned here, please leave them as default or blank.
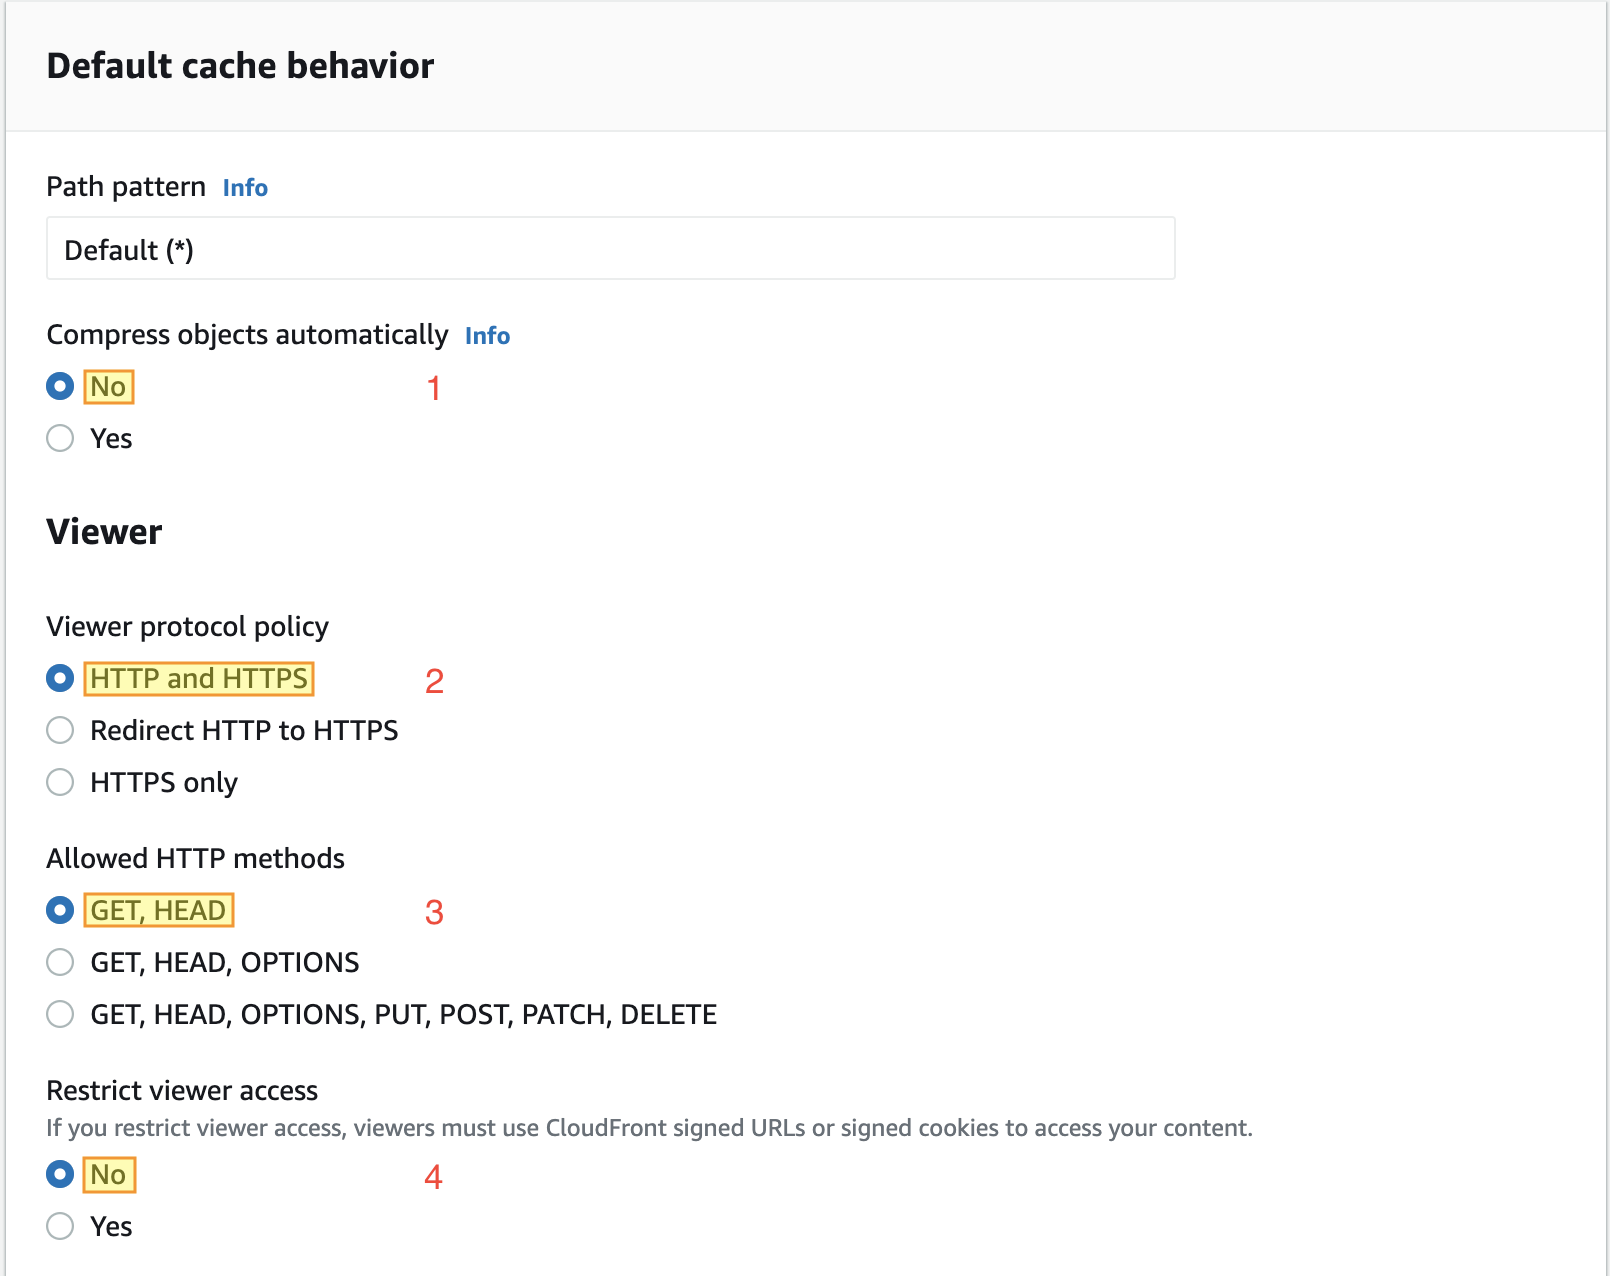
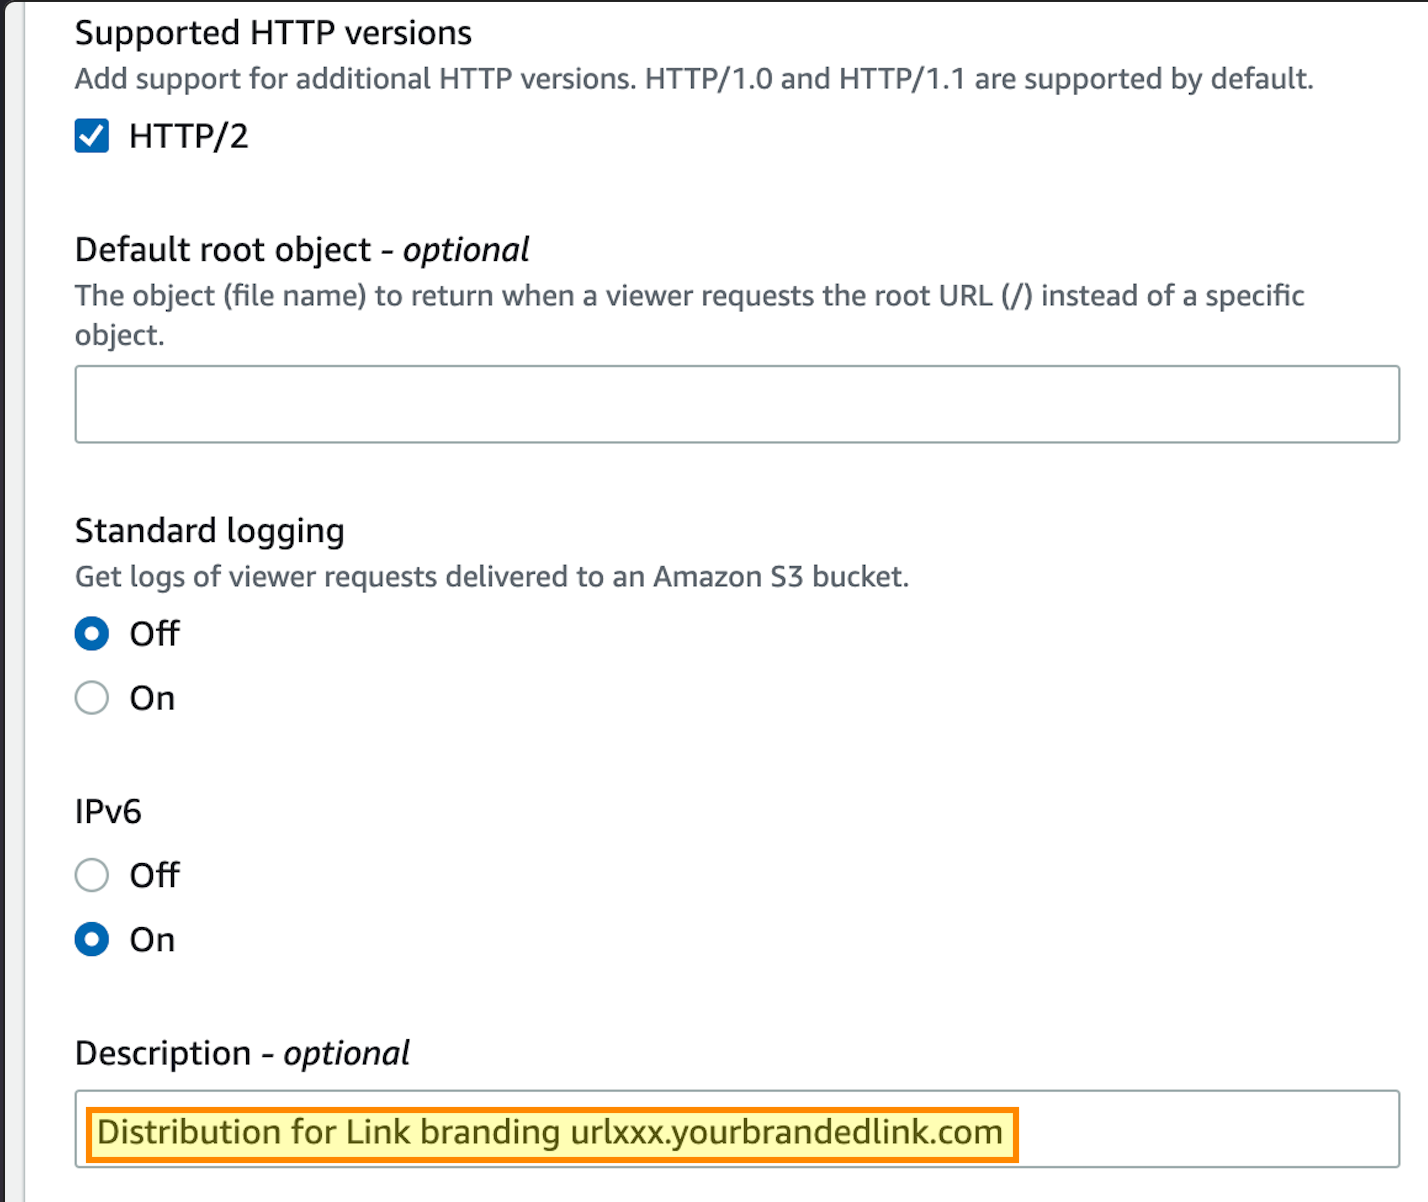
Default cache behavior
- For "Compress objects automatically," select "No"
- For "Viewer protocol policy," select "HTTP and HTTPS"
- For "Allowed HTTP methods," select "GET, HEAD"
- For "Restrict viewer access," select "No"
- In "Cache key and origin requests" section, select "Legacy cache settings".
For all the options that appear below ("Headers," "Query strings," and "Cookies") please select "All"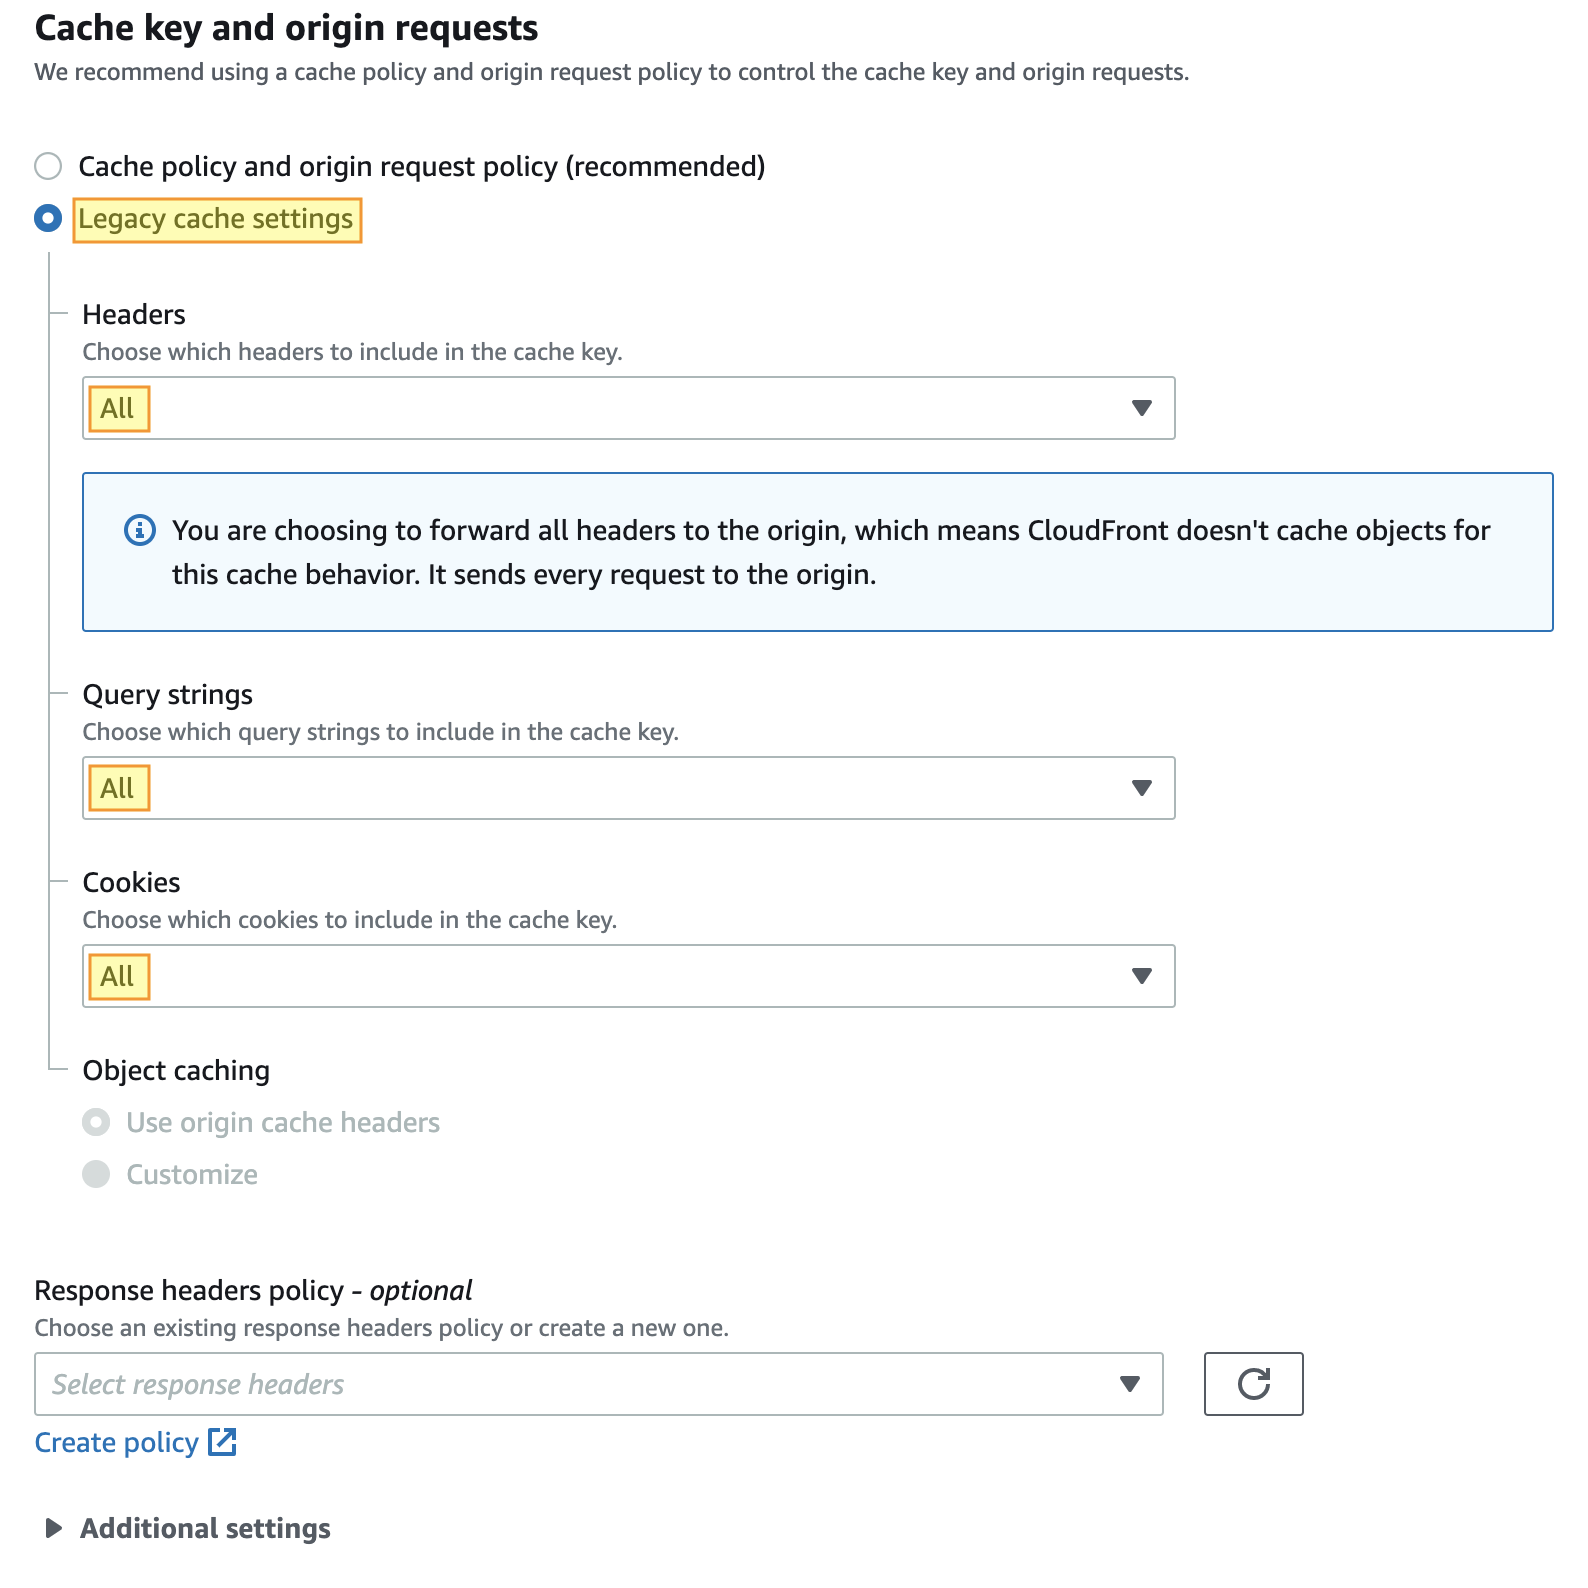
Note: For fields not mentioned here, please leave them as default or blank.
Settings
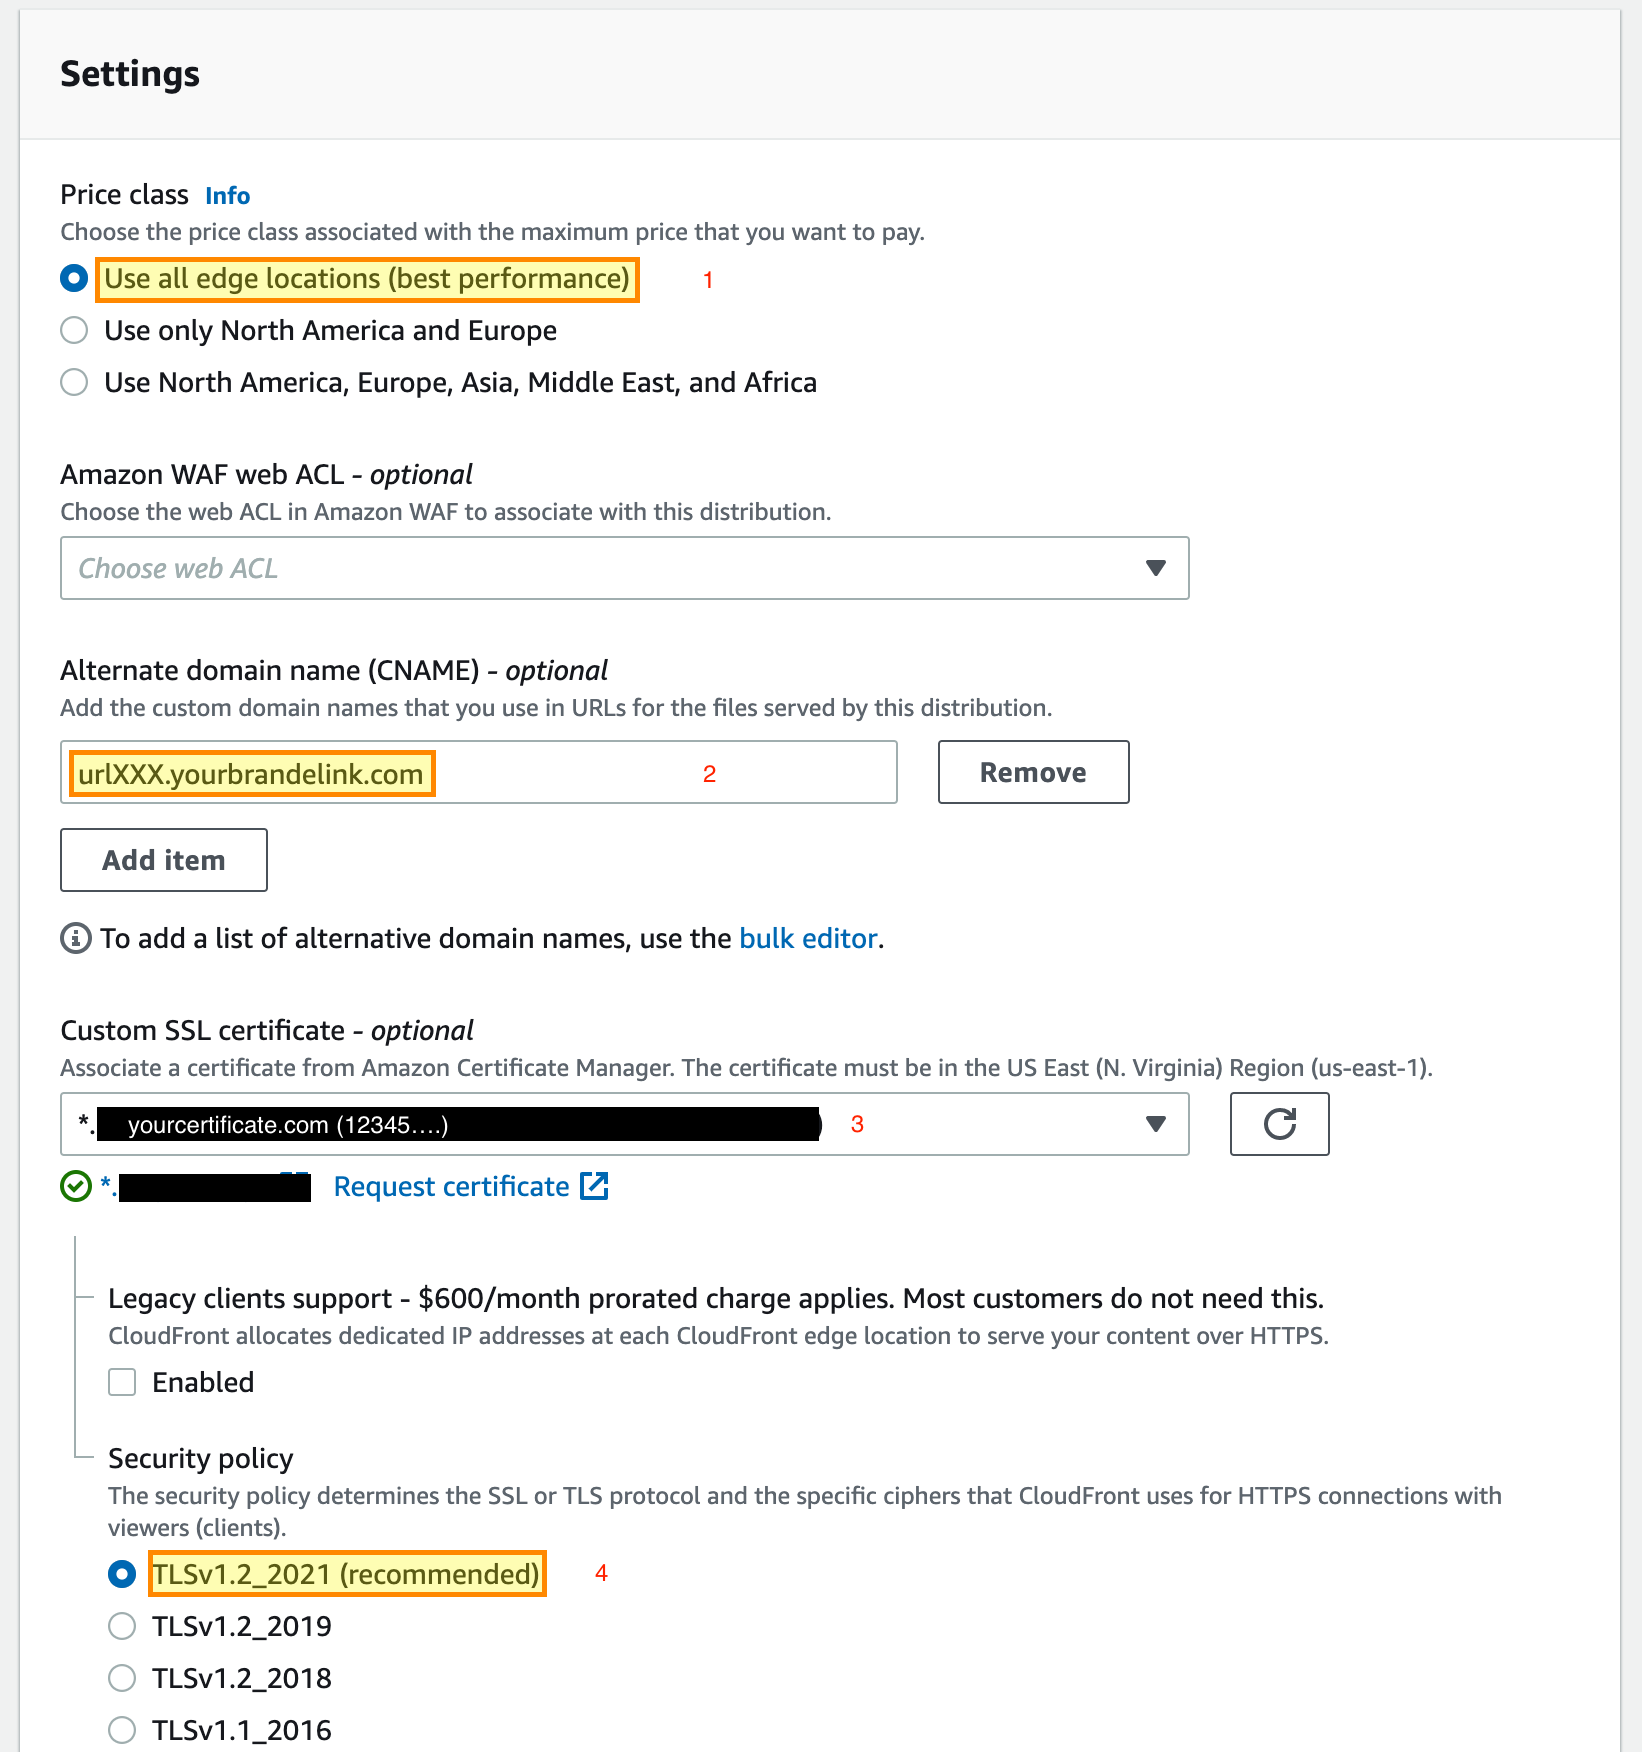
- For "Price class," select "Use all edge locations (best performance)."
However, you can decide the option that best suits the requirement. Notice prices may differ, please refer to CloudFront documentation for assistance, if you have need further clarification on this. - For "Alternate domain name (CNAME)," Click on "Add Item" and type in your link branding.
- For "Custom SSL certificate," please select your SSL certificate. If you don't have one issued yet, click on "Request Certificate" and look for "How to request a Certificate"at the end of this article.
Once the certificate is issued, please click the refresh button "⟳" and select the certificate from the dropdown menu. - Specify a TLS version for your security policy.
- Click on create distribution.
- Enter a description for the distribution:
Configuring your DNS host
1. Access your distribution and go to the general tab
2. Copy the distribution domain name.
Important: Go to your DNS host and look for the link branding that you are configuring. ("urlXXX.yourbrandedlink.com")
Then point the DNS record for your link branding to your distribution domain name; previously, the branded link was pointing to "sendgrid.net."
Remove the "https://" portion of your distribution name when pasting it in your DNS host. It should look like abcXXXXXXX.cloudfront.net
IMPORTANT: Do not validate the DNS record of your branded link configuration more than once in SendGrid. After performing the previous changes, a second validation will fail, and the authentication will stop working.
3. Finally, please be sure where it says "last modified" is showing a date. If it's in "Deploying" state, please wait until you can see a date. 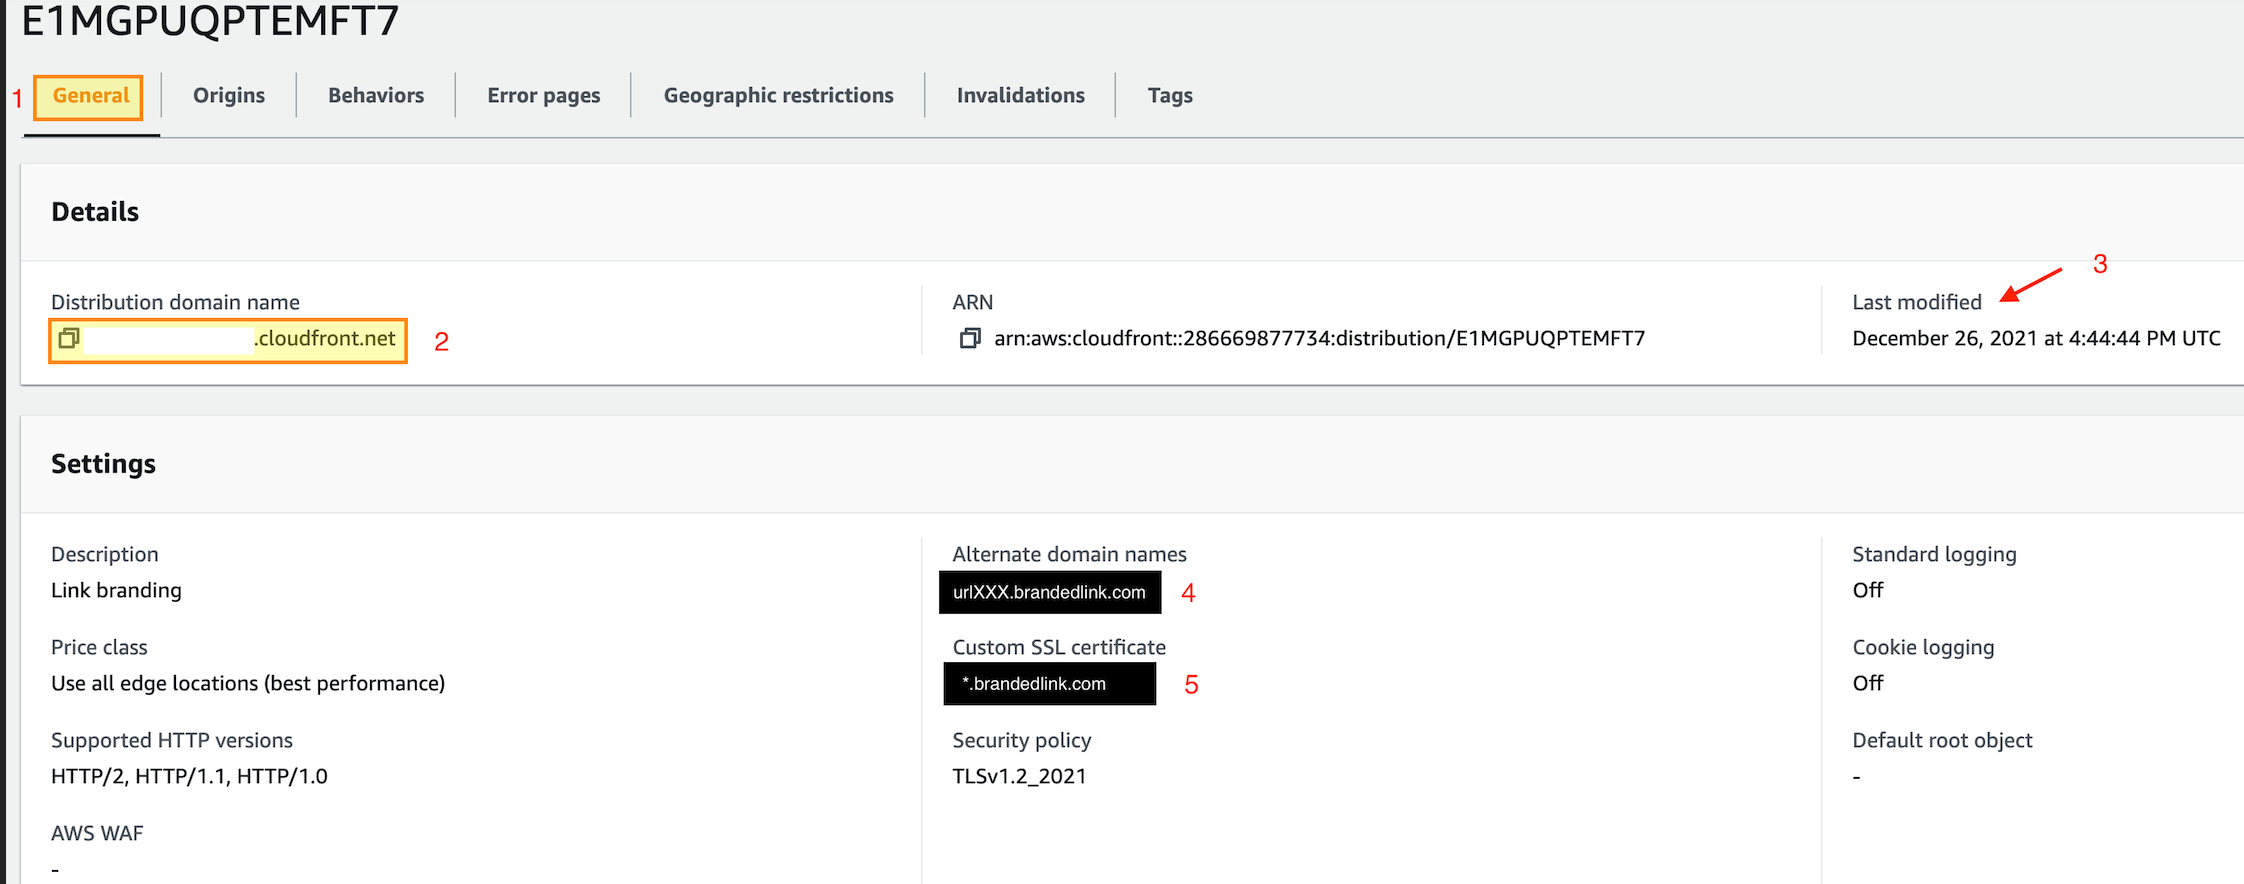
4. "Alternate domain names" should show your branded link
5. "Custom SSL certificate" should show your certificate.
Once all of this is done, you will need to contact SendGrid support and request that SSL click and open tracking be enabled on your account. They will then verify the configuration and enable the setting on your account.
How to request a Certificate
a. Select "Request a public certificate". Click next.

b. Enter *.yourdomain.com
(The domain must match the same domain as the branded link)
Use an asterisk (*) to request a wildcard certificate to protect several sites in the same domain.
For example, *.example.com protects www.example.com, site.example.com, and images.example.com.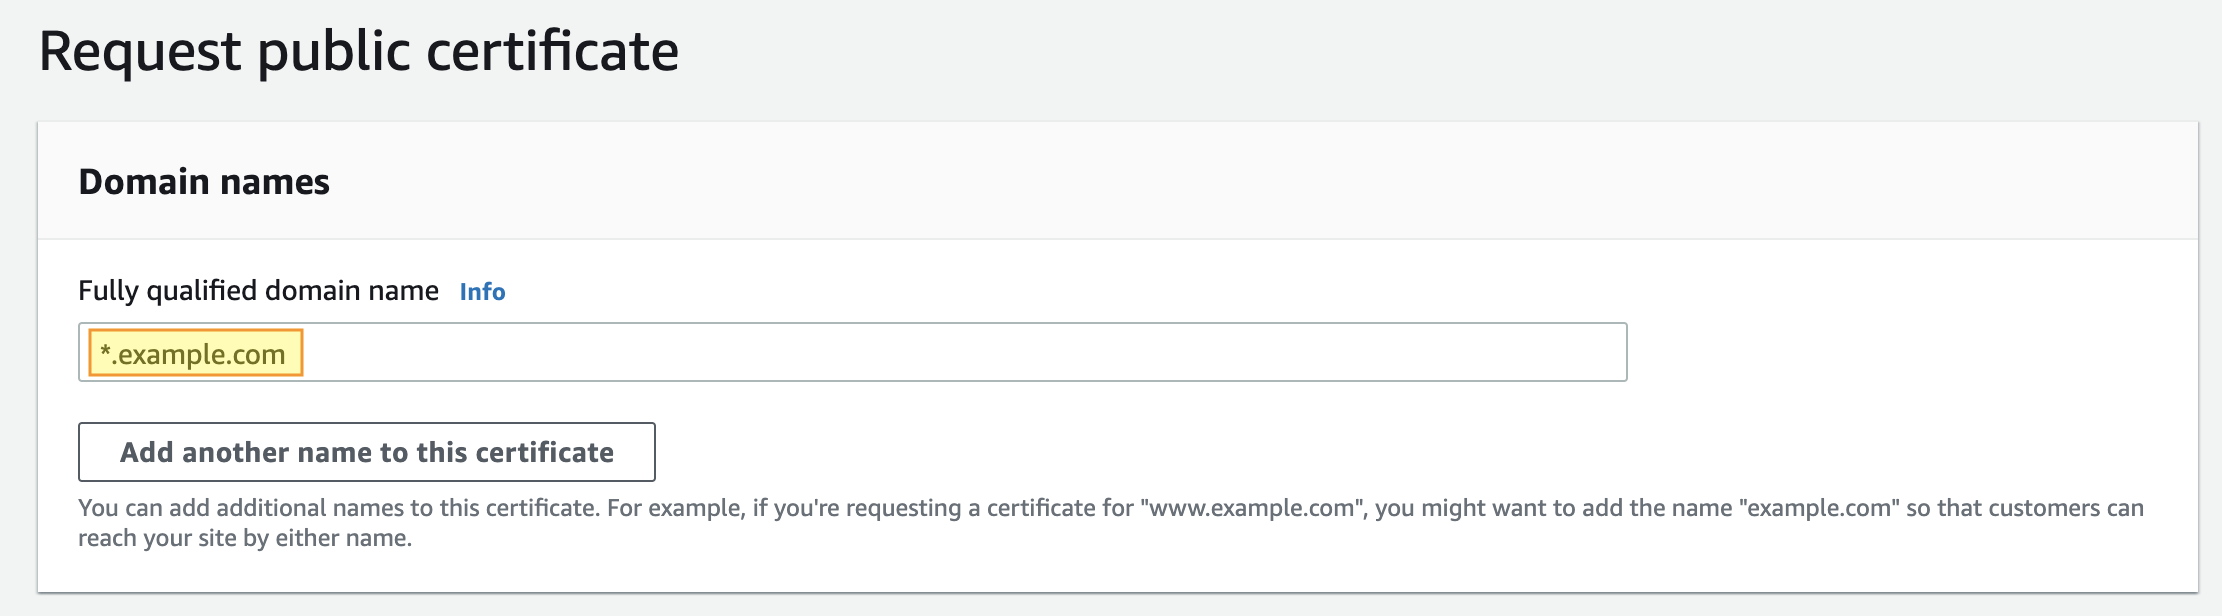
c. Select a validation method. In this case, we select DNS validation. Then click on "request"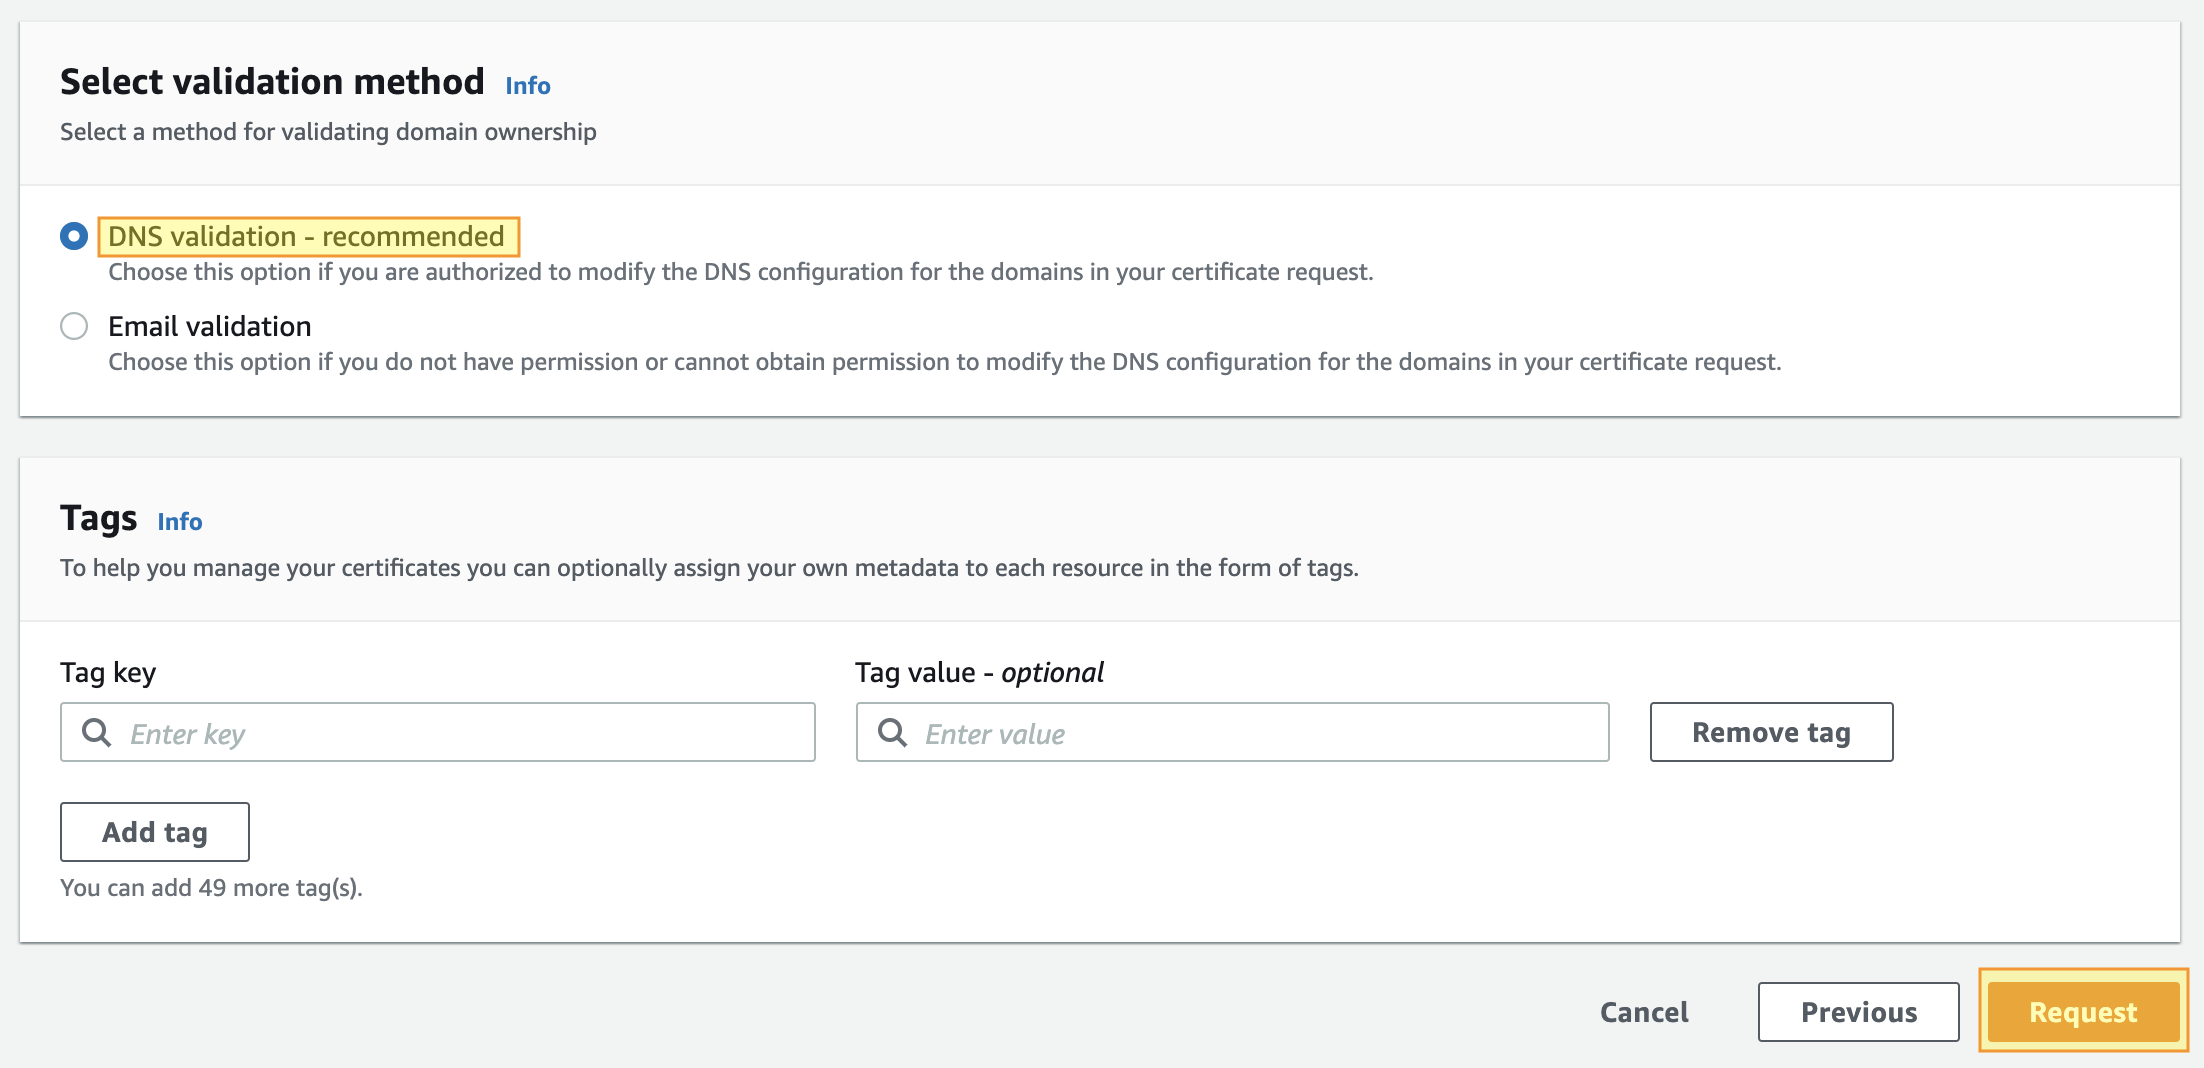
d. A new webpage will be opened. Please select "view certificate". At the top:
e. It is necessary to validate the certificate. Therefore, you must add the CNAME name record and its respective CNAME value in your DNS host provider.
Please notice the Status "Pending Validation" will change to "Issued" once you have added the records. Additionally, please be patient, the change might take a while.
Please be careful, sometimes DNS providers append your domain automatically to the CNAME name. If that's the case, please remove that portion when adding the record in your DNS host provider. 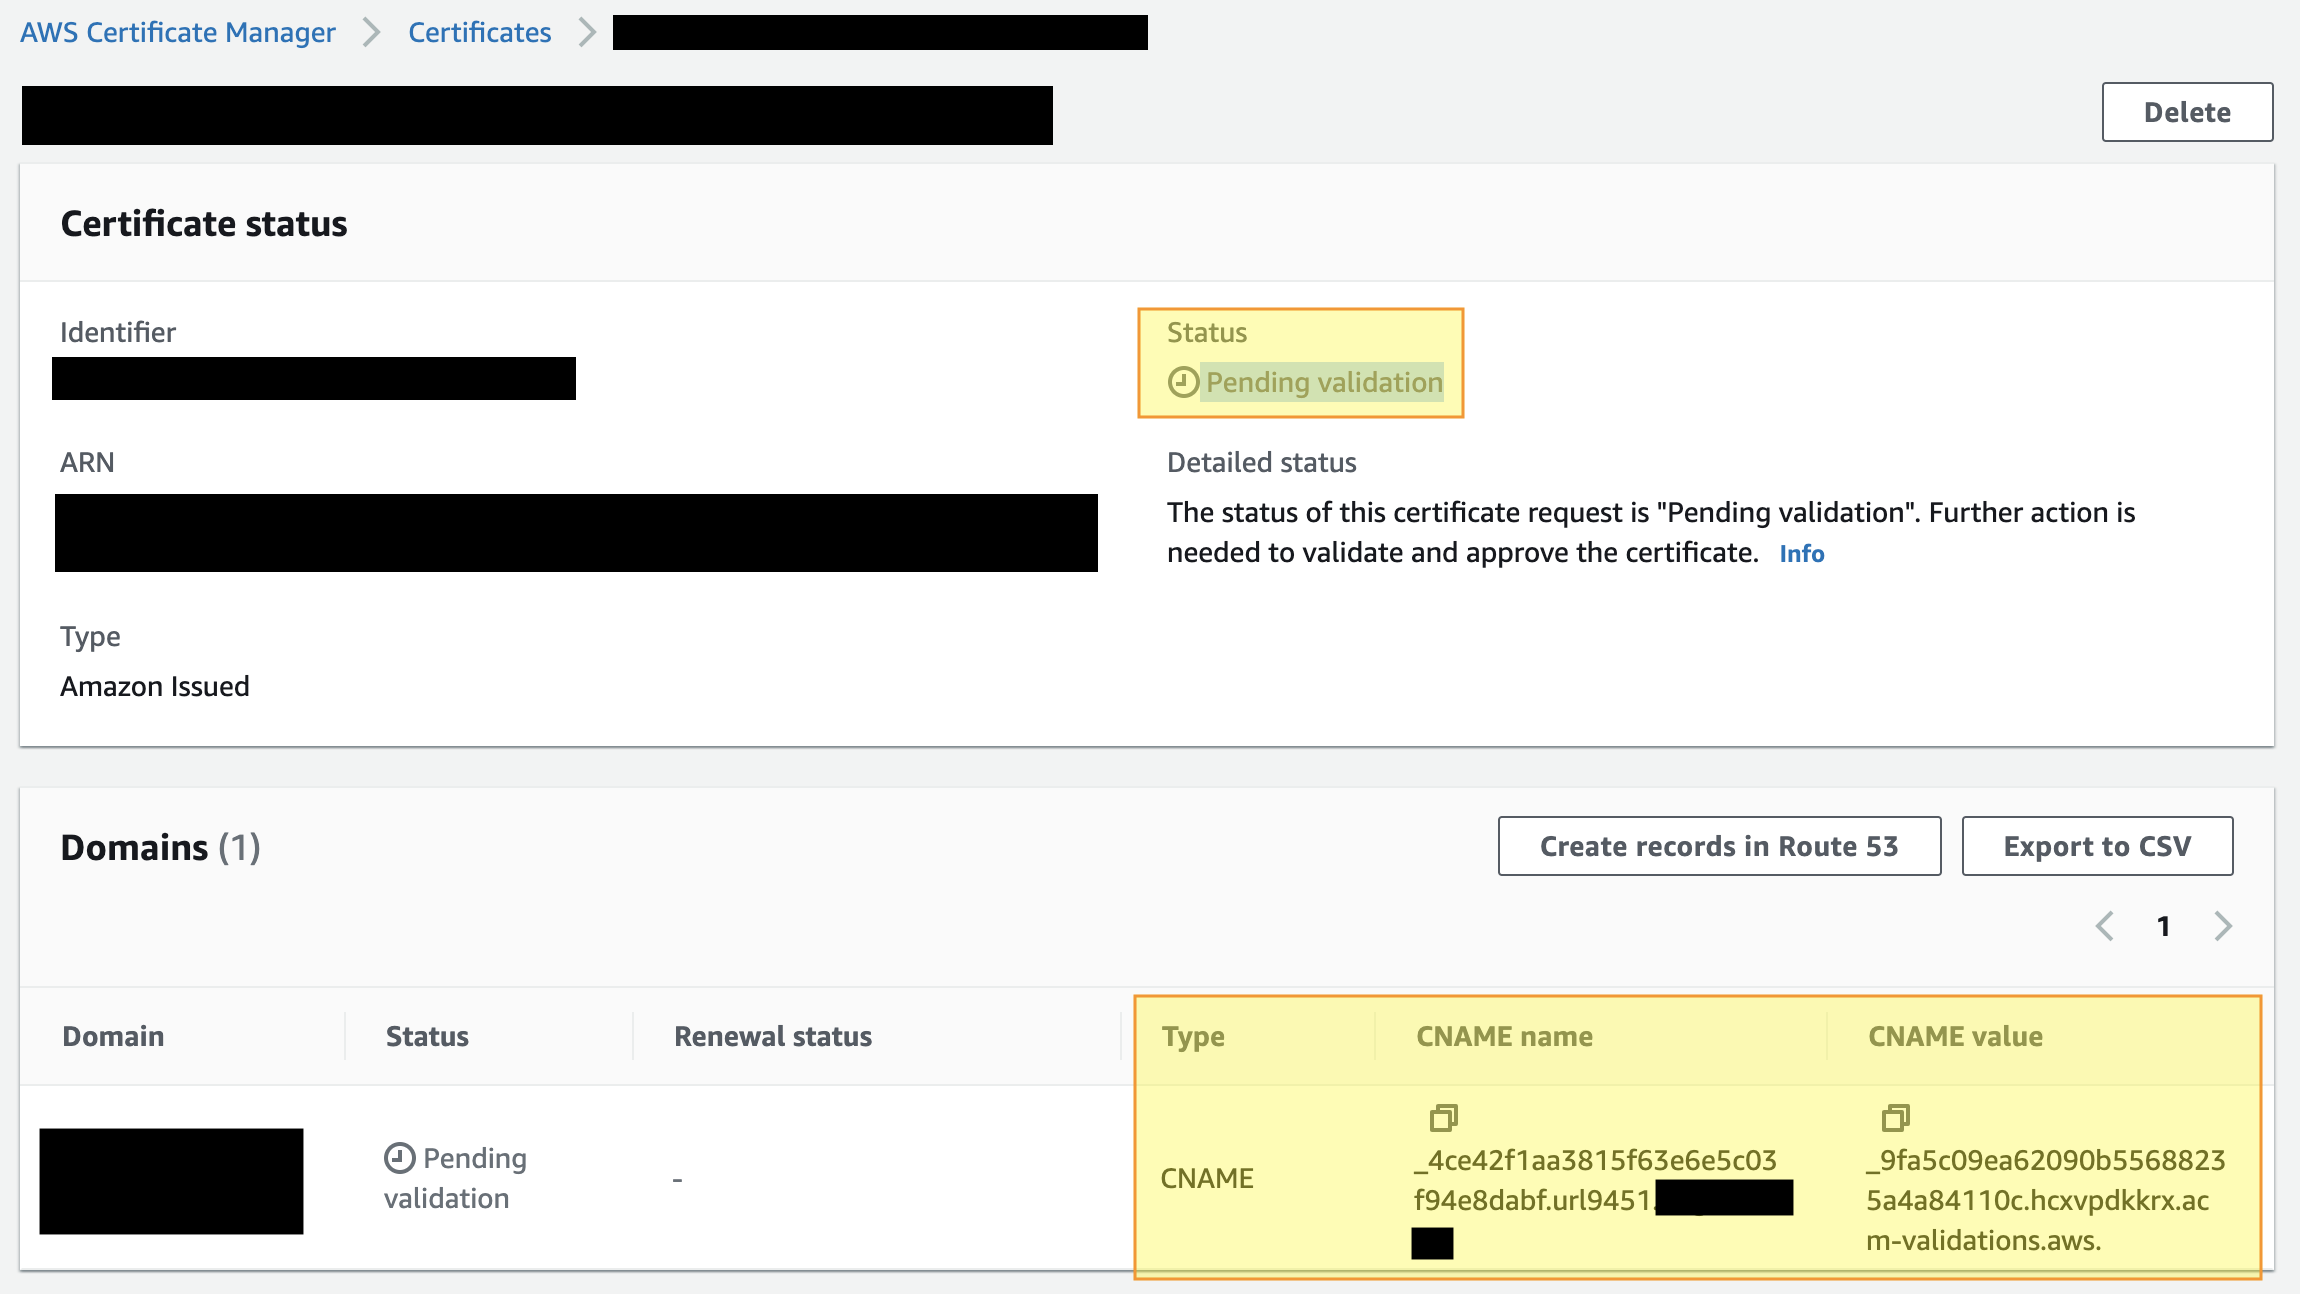
Status issued: 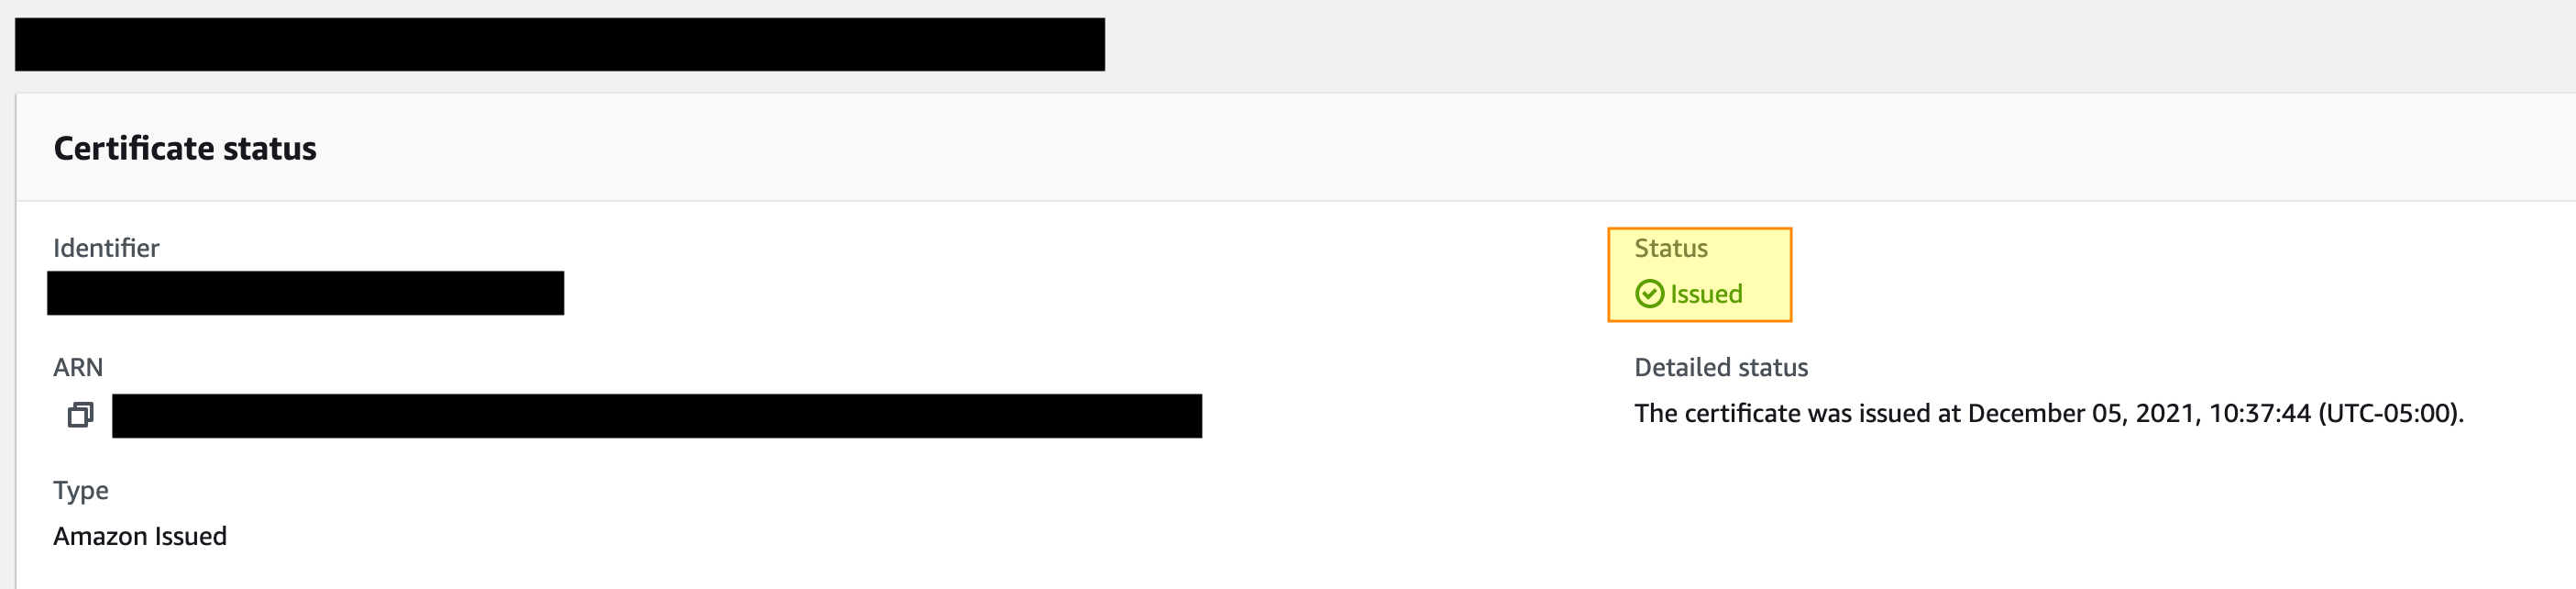
Once your certificate has been issued, you can continue with the configuration above. (look for settings step 3 to finish the setup)